
253 字
1 分钟
搭建NeZha探针 套CloudFlare ipv6小鸡废物利用
1、安装Warp(如果VPS有ipv4忽略此步骤)
wget -N https://gitlab.com/fscarmen/warp/-/raw/main/menu.sh && bash menu.sh [option] [lisence/url/token]如果warp获取不到ip 执行:
wg-quick down warp &>/dev/null; sed -i "s/Endpoint.*/Endpoint = engage.cloudflareclient.com:4500/" /etc/wireguard/warp.conf; warp o2、安装NeZha
curl -L https://raw.githubusercontent.com/nezhahq/scripts/refs/heads/main/install.sh -o nezha.sh && chmod +x nezha.sh && sudo ./nezha.sh3、安装Caddy
apt install caddy4、Caddy反代(如需Nginx反代请移步官网查看)
nano /etc/caddy/Caddyfile dashboard.example.com { @grpcProto { path /proto.NezhaService/* }
reverse_proxy @grpcProto { header_up Host {host} header_up nz-realip {http.CF-Connecting-IP} # 替换为你的 CDN 提供的私有 header,此处为 CloudFlare 默认 # header_up nz-realip {remote_host} # 如果你使用caddy作为最外层,就把上面一行注释掉,启用此行 transport http { versions h2c read_buffer 4096 } to localhost:8008 }
reverse_proxy { header_up Host {host} header_up Origin https://{host} header_up nz-realip {http.CF-Connecting-IP} # 替换为你的 CDN 提供的私有 header,此处为 CloudFlare 默认 # header_up nz-realip {remote_host} # 如果你使用caddy作为最外层,就把上面一行注释掉,启用此行 transport http { read_buffer 16384 } to localhost:8008 } }5、CloudFlare开启grpc
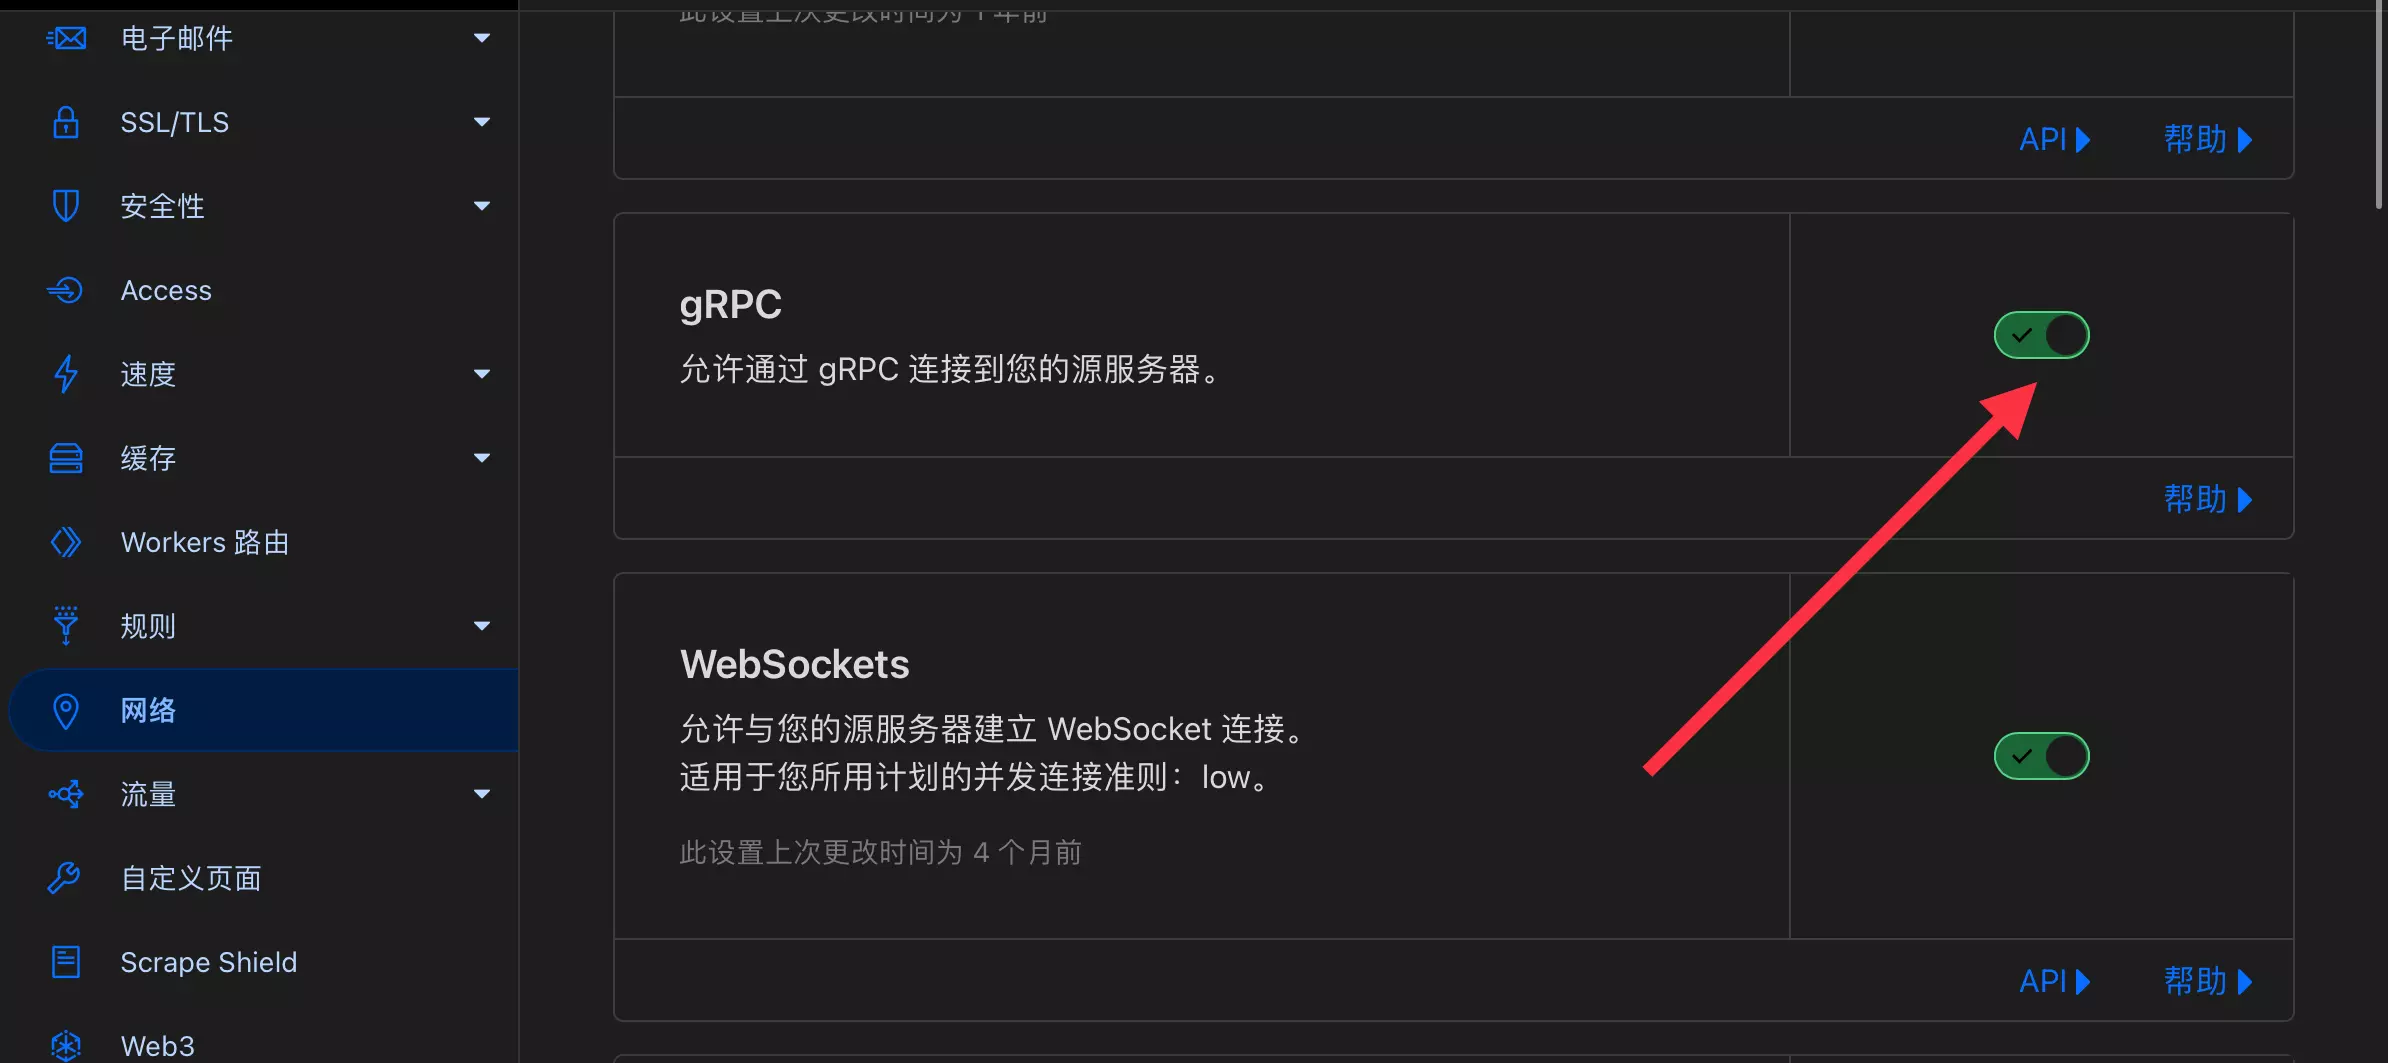
网络-grpc开启 如图所示
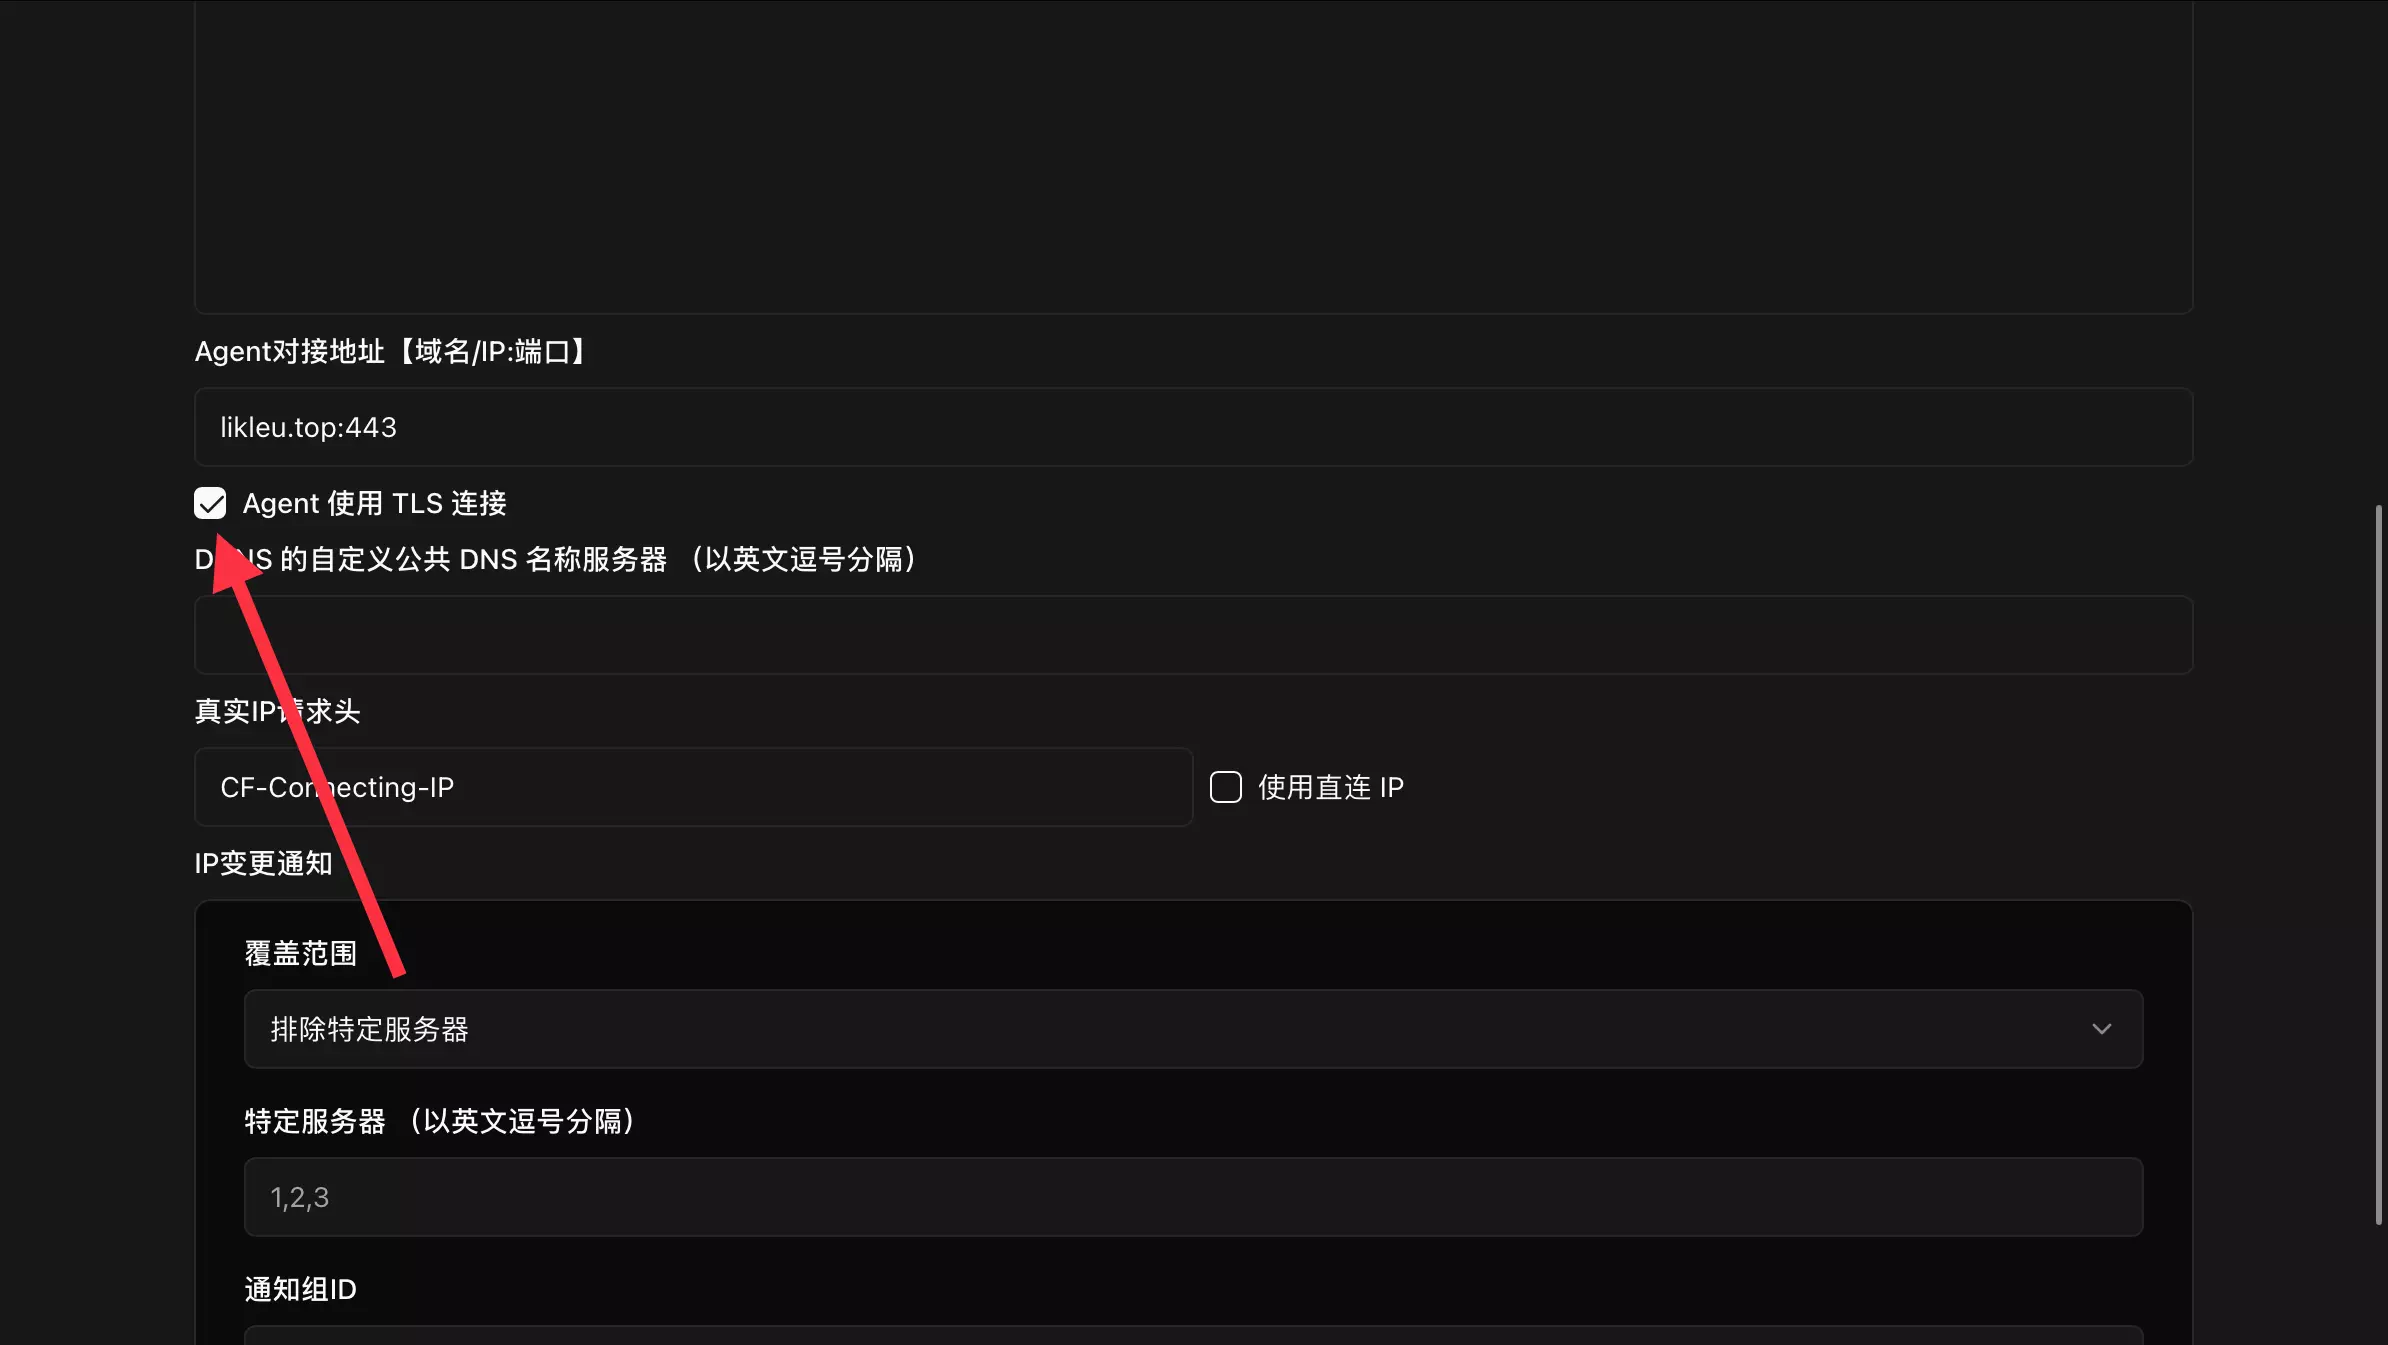
6、对接Agent
NeZha后台要把端口换成443 开启tls 如图所示
搭建NeZha探针 套CloudFlare ipv6小鸡废物利用
https://blog.leuxx.de/posts/18/